On December 17, 2007, I announced my 2008 video archiving strategy. A year later, I drafted a revised plan. And today, with an even newer plan, I’m pleased to announce that I’ve commenced archiving.
Overview
VHS (and VHS-C) tapes go through an analog to digital converter and are imported directly to my hard disk. The video is simultaneously recorded on DVD-R using a dedicated DVD recorder.
MiniDV and HDV tapes are imported to hard disk in their native formats via FireWire.
All of the data on my hard disks is backed up with Carbonite, an offsite backup service.
Now, let’s get into the details.
Analog to digital conversion
My previous plans had me recording VHS to MiniDV and then capturing that, or recording to DVD and ripping those. The MiniDV process would mean two realtime tape transfers (doubling the time required for each tape), and the DVD ripping would have potential quality issues. I finally decided to do a one-time tape transfer, direct to the DV codec, which is more than enough quality for VHS source material to keep me from wanting to recapture it from tape at a later time.
I got a couple of recommendations for the Canopus ADVC110, which converts S-Video and composite video to DV (and the other way around), and it’s been working great. They have a cheaper model, the ADVC55, but the 110 was the only model that explicitly supports locked audio (the audio and video won’t drift out of sync during long captures), so I paid the extra money to make sure that everything remains in sync while capturing video two hours at a time. Plus, it’s pimped out with blue LEDs.
Let’s trace the connections.
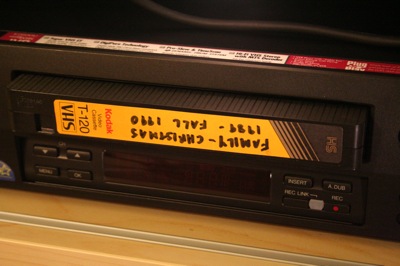
The tape goes into the VCR.
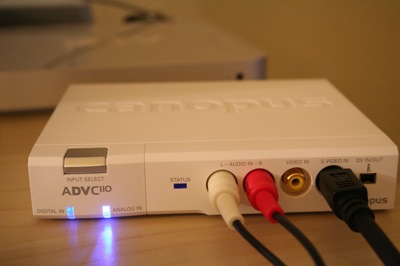
The video out of the VCR is connected to the front inputs of the ADVC110.
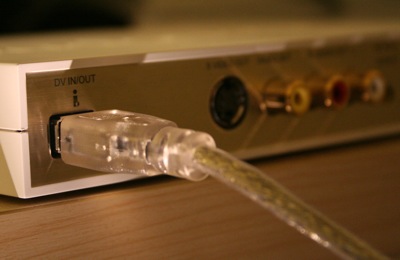
The DV port is connected (via included FireWire cable)…
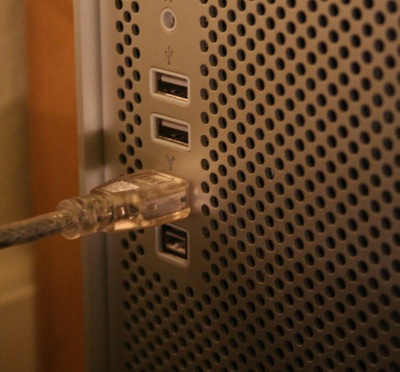
…to the computer. If you do not have a computer, a cheese grater from Jonathan Ive’s kitchen is a suitable replacement.
I also use the coax output of the VCR to pipe the video signal to my DVD recorder (for instant backup) and then from there to my TV for monitoring.
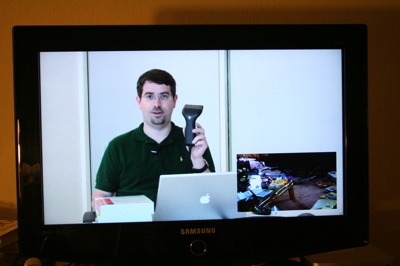
Of course with a couple of decades worth of memories to transfer, I don’t think it would be healthy for me to watch them with my full attention every night after work since any reminder of home triggers intense nostalgia. To help avoid this, I relegate the home video to a small picture-in-picture window while watching and listening to other content on the larger screen. Now, I miss home, I want to travel back in time, and I’ve formed a memory of Matt Cutts giving me a barcode scanner for Christmas.
The same process is used for my HDV and DV tapes; except they skip the whole conversion process and just go directly from camera to computer via FireWire.
Media management
As I mentioned before, iMovie is now designed to organize a video library, so that’s what I’m currently using to import and describe my videos. The process is easy.
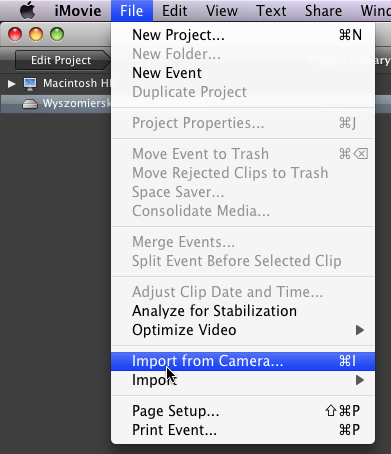
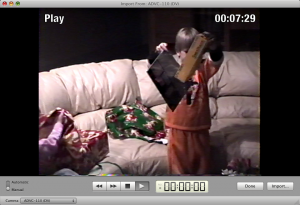
For the VHS tapes, I don’t have device control of the VCR of course, so Ihave to go old-school and cue up the tape myself in manual mode. I click “Import” when I’m about ready to go.
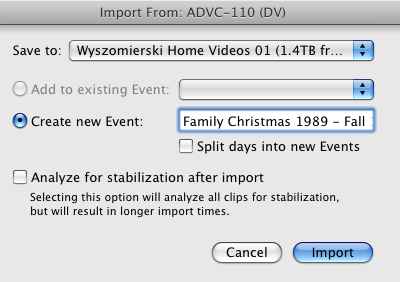
I create a new event for each tape, and title it as whatever is written on the label. Then I click “Import” and roll the tape.
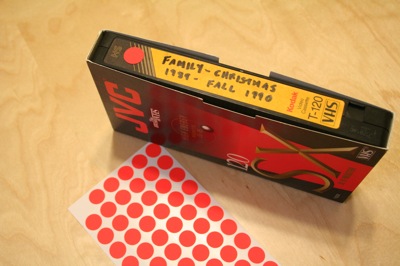
When I’m finished importing the tape, I mark it with a sticker.
What’s really cool is that iMovie appears to keep all of the necessary meta data encapsulated in an event folder, so you can move “tapes” from hard drive to hard drive without having to reconnect any media files or even re-add the events to your iMovie library. iMovie will just recognize them.
As you have probably already assumed, all of this video fills up a lot of hard drive space. Two hours of footage (one VHS tape) comes out to a little less than 25 gigabytes. Even the thumbnail files (iMovie generates a visual timeline that you can scan by mousing over) are over a gig for each video.
By the way, I know I keep referring to VHS, but you can assume that all of the video will run at about the same rate, since with my process VHS is converted to DV, DV is imported as DV, and HDV has the same data rate as DV. 🙂
Fortunately, storage is always getting cheaper. I originally picked up two Iomega Prestige 1.5 TB drives on Amazon for less than $150 each. I think the last Iomega product I owned before these was a Jaz drive. I had a single 1 GB disk for it and liked the cool sounds it made. It was also handy for transferring video files between school and home before the days of USB thumb drives.
I planned on using these external drives as my primary storage until I ran into a hitch (described below) which requires me to use my internal drives.
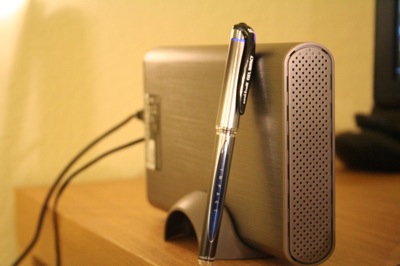
As you can see, 1.5 terabytes fits in a pretty small package these days.
I’ve only purchased one additional internal drive so far, since I figured it makes more sense to buy them as I need them, with prices on a steady downward trend. I went with a Western Digital 1 TB SATA drive, because it was in a green box and saves the Earth by decomposing or something. Perhaps I shouldn’t be choosing hard drives based on how well they rot, but it was only $120 at Best Buy, and I see it listed for a nice $99 right now on Amazon.
Adding an additional internal hard drive (or two or three) is ridiculously easy on a Mac Pro. You don’t even need to connect any cables; the data and power ports are lined up perfectly. You just open up the case (no screws, no unplugging cables), pull out a bracket, screw it onto the hard drive, and slide it back in. Seriously. To see for yourself, check out the excellent videos by Other World Computing embedded in this article. Once I turned my computer back on, all I had to do was click “Initialize…” on the somewhat scary “The disk you inserted was not readable…” message, and within seconds had a working hard disk.
Backup
The main idea behind this project was not to get convert our analog media to digital to make it accessible (we have plenty of VCRs laying around), but rather to make sure that there wasn’t just one copy of each memory. It’s really easy to copy digital bits (and there’s no loss in quality), so I figured once I had the videos in the computer, backing up would be easy. I was wrong.
For local backups, I simply copy over my files to a couple of 1.5 TB external hard drives. It’s dead-simple to set up a RAID 1 array in OS X, but since I’ll likely end up filling all of my internal drives, and I’m not recording a live feed that I’ll never be able to transfer again, the manual copying via USB be fine. Matt Cutts calls this technique a “poor man’s RAID.” For my non-video backups on my laptop and desktop, I use Time Machine.
My backup plan also needed to utilize offsite backup, since if my backup drive is right next to the original, both copies could easily be lost by the same theft, earthquake, water damage, etc. I originally tried signing up with Mozy, which is about $5/month for unlimited backup. To make a long story short, Mozy simply couldn’t get through a single large DV file (>20 GB) without giving up and failing. To be fair, this was probably due to my Comcast connection not staying completely alive during the entire upload, but you would hope that the software could accomodate for a brief loss in connectivity. I tried contacting their technical support team about this and was not satisfied with the quality of their responses (a “Sorry, a file that big probably won’t work” would have been fine), so I cancelled my account. I had prepaid for 2 years of service, and I’m still waiting to hear back from them about a refund.
A similar backup service, Carbonite, is also about $5/month for unlimited backups, and they offer a free trial. One drawback is that Carbonite doesn’t currently support external drives, but I’m not close to filling up my four SATA bays, so it hasn’t been an issue. Another minor annoyance is that any files larger than 2 GB need to be manually selected for backup, but it’s not a huge pain. Carbonite has already successfully backed up a 20+ GB test file (it took about 30 hours), so I’m sticking with them for now. (Update on 7/18/09 – I don’t know if it’s Carbonite or Comcast — based on other reviews I suspect Carbonite — but someone is throttling my upload. So, at this point, I won’t endorse Carbonite or Mozy for backing up large files.)
Update: Now I’m using LiveDrive.
Newer update: I had trouble with LiveDrive too and now I’m really not using anything. I’m open to suggestions.
Cost
Considering that I’m archiving priceless memories, I think this project turned out to be rather inexpensive. Here’s what it’s cost me so far:
ADVC110: $200 from B&H.
iMovie (part of iLife ’09): $80; free with new Macs.
Carbonite: $130 for the three year plan, which is less than $4/month.
Hard drives: Let’s say it’ll be $100/TB
Total: Eh, around 5-600 bucks for about 160 hours of video (I’m not sure how much I have; that could cover it) and three years of backup. That’s how much the iPhone cost (and no, not with 3 years of service) when it first came out.
The Future
What’s my plan for new video? I think the next big step I’ll have to take is getting a camera that doesn’t record to tape; likely in the AVCHD format since I can work with it natively in Final Cut. When I record to a non-linear format, importing video will be as easy as clicking “import,” I’ll be forced to import it more often since I’ll need to free up space on the camera, and the clips will be a few minutes long rather than two hours. That last bit, the segmented clips rather than one long tape, is a key difference that will change how I deal with video in the future. Rather than treating video as separate from my still photos, I think that with shorter clips (which will all have timestamps), I’ll just keep the video clips in Picasa and have one big photo/video library that doesn’t silo images based on whether or not they move.
And my next big archiving project? Still photos. I plan on getting started when I go home later this month. Get ready, ScanCafe.
One more thing
I have one final thought to leave you with after I’ve watched a few home videos. I know that many people don’t shoot video. If you don’t, please try. Video is not just for people who have kids or who do exciting things on skateboards. The next time you’re somewhere with your camera, just try flipping it into video mode for 30 seconds. It doesn’t have to be something that justifies the use of video; just let it roll and capture the ambience. Years from now, you may be glad you did.
Doing video is fun and cheap. Easy to delete them if you don’t like it. If you like pictures you’ll love video. I keep my clips short (2 minutes and under) and shoot lots of them. No editing required if I want to put it up on the web.
My Vhs tapes go back to 1982. from an old tube sharp camera fed thru a wire connected to a panasonic vcr that weighed about 80 pounds. Thank God i copied them in the 90s because the originals look like crap now. I copied the vhs tapes to dvcam using an old sony DHR-1000. my first DV cam was a Sony DCR-VX1000 I got in 1996, still works great today, but now I use the HDV cameras but I still pull that old baby out sometimes. I had a couple of Sony Hi8s that i used for years too. they finely went bad, sent them to Sony and they said they where to old to repair. i pretty much do the same thing you do but i have a PC machine. I do a step that you dont, i save the raw AVI file to hard drives and blue ray data disks. Cyberlink works the best. its a little corky but once you get a system down it works ok. I just dont trust the hard drive only. DVD is ok but the file is compressed from its original form, i never liked the sound of that. I do all this work, time and money and most likey my kids will throw them out after i die, lol. I thought I was the only nut that wanted to save these old tapes.
Nice post – well written, clear and concise. I have a little side business doing video transfers for folks. I also use iMovie and have grown to love the events/projects aspect. It’s so easy to create movies from a variety of tapes/events.
I recently added cloud storage as part of my back up plan. I chose Backblaze because they do support external drives – and it’s also $5 a month for unlimited storage.